It’s said that every woodworker must make at least one cutting board (sometimes also known as a butcher block or chopping board). Those are the rules. Not being a rule-breaking scofflaw, I decided this year to get that task out of the way, but with a further purpose in mind.
There are two basic types of cutting boards: end grain and edge grain (there’s also face grain but that seems like a subcategory of edge grain to me). End grain, with the wood grains lying perpendicular to the cutting surface, are said to be easier on knives and more durable. Edge grain boards are easier to maintain and generally cost less (if you’re buying one, not making one). I have both types in my kitchen but for this first one made in my shop, I chose edge grain.
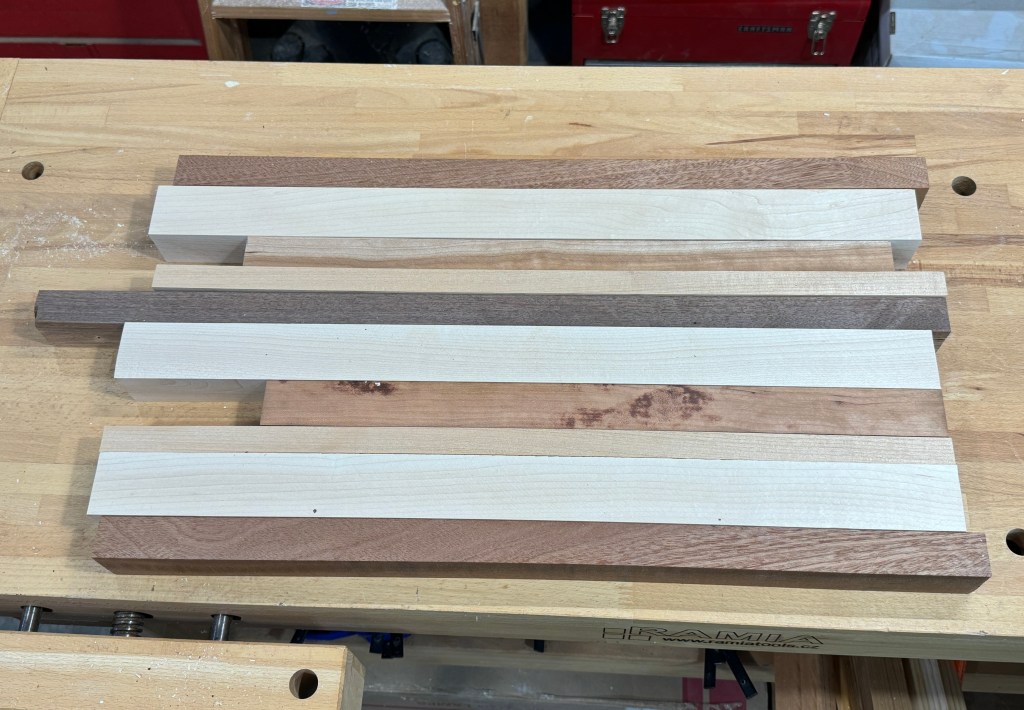
Cutting boards are typically made of hardwood, often more than one species. Maple is common, as are walnut, cherry and ash. The wood should be tight-grained. Open pore woods such as oak, which is a hardwood, are deemed unsuitable as the pores will capture food particles and encourage bacteria. For mine, I looked first to my existing wood supply and found some workable walnut, mahogany and ash pieces. But no maple, which I really wanted, so I bought some at the local hardwood store. Also picked up a piece of sapele.
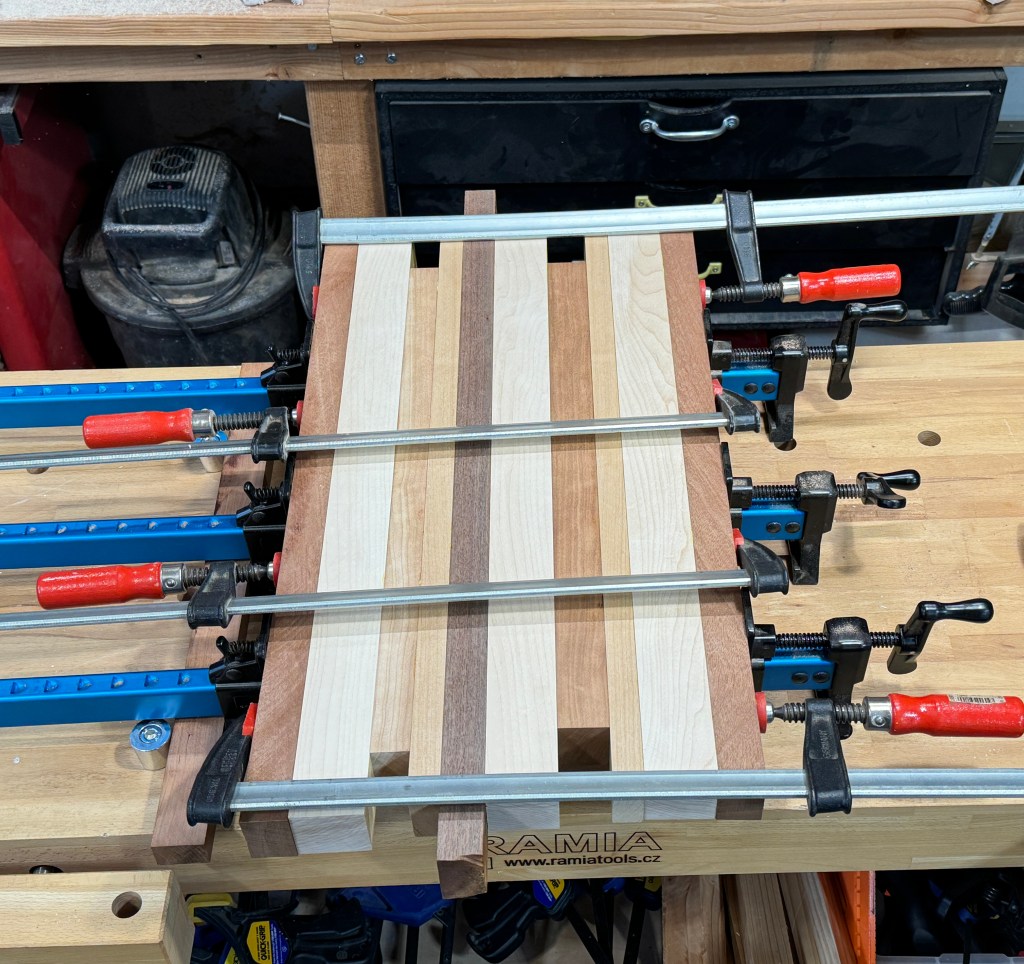
After sizing the various pieces more or less to width on the table saw, and keeping the maximum width of my planer in mind (13″) here’s the layout:
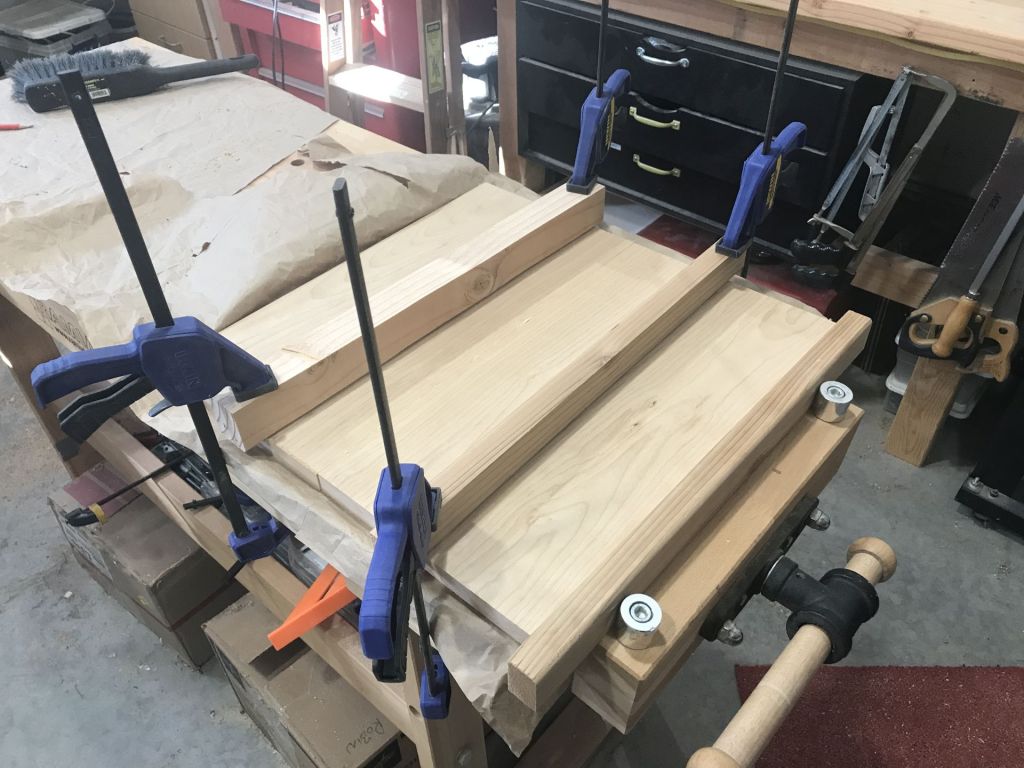
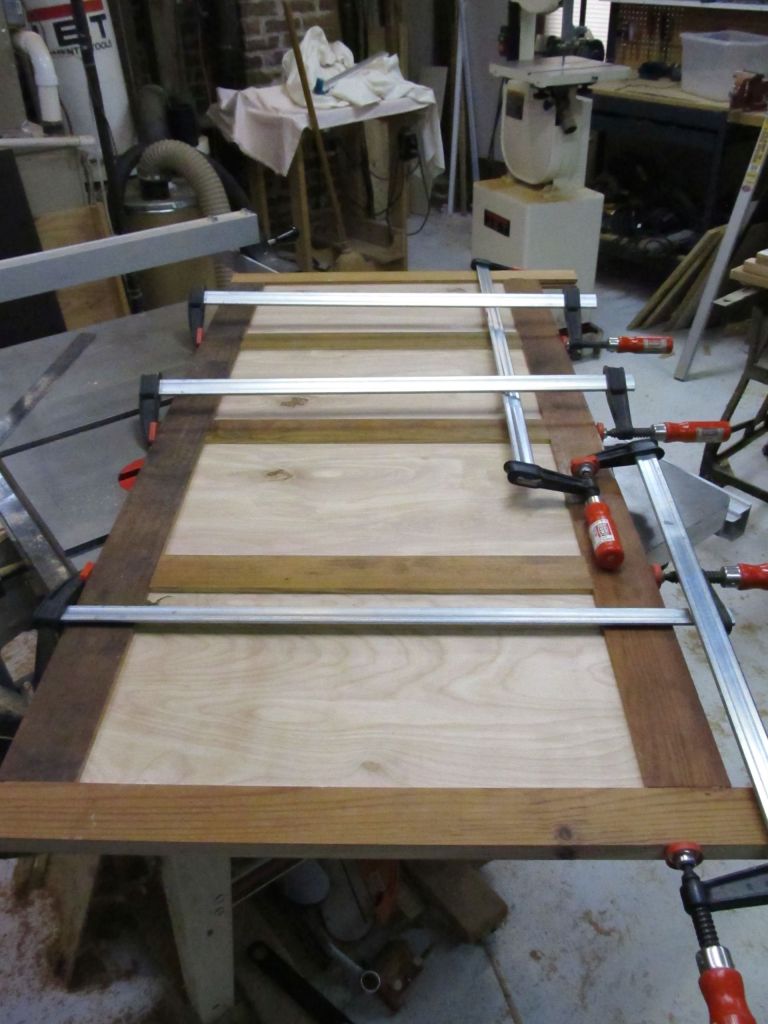
Next step is the glue-up, ensuring the entire face of each piece is coated with glue:
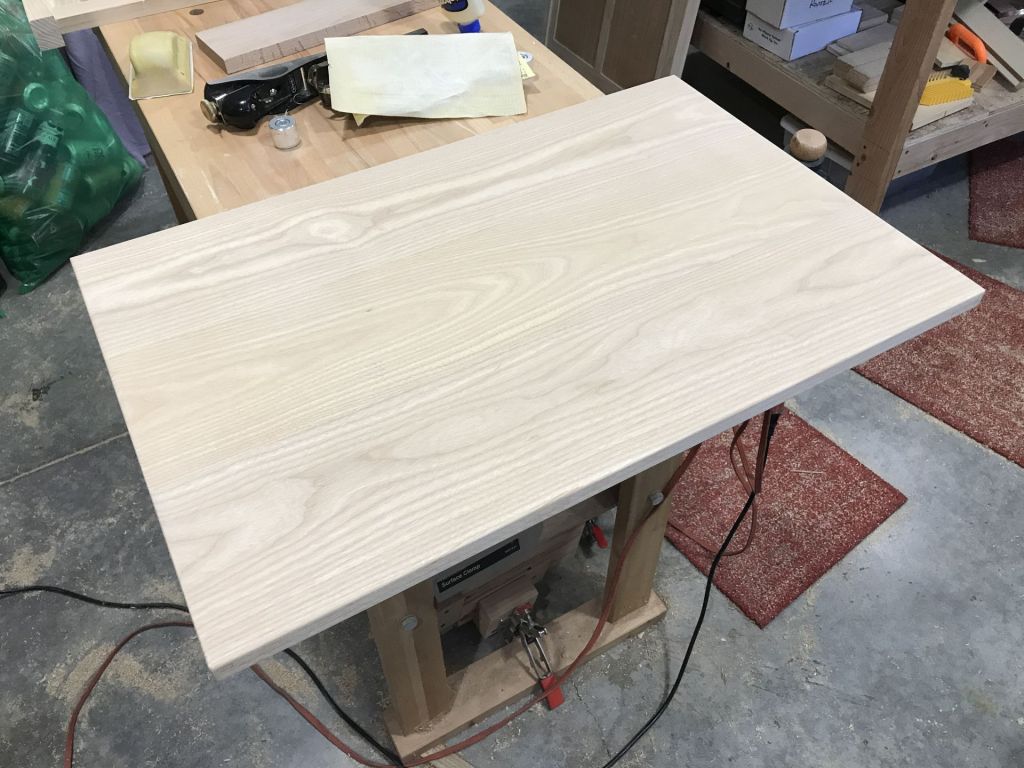
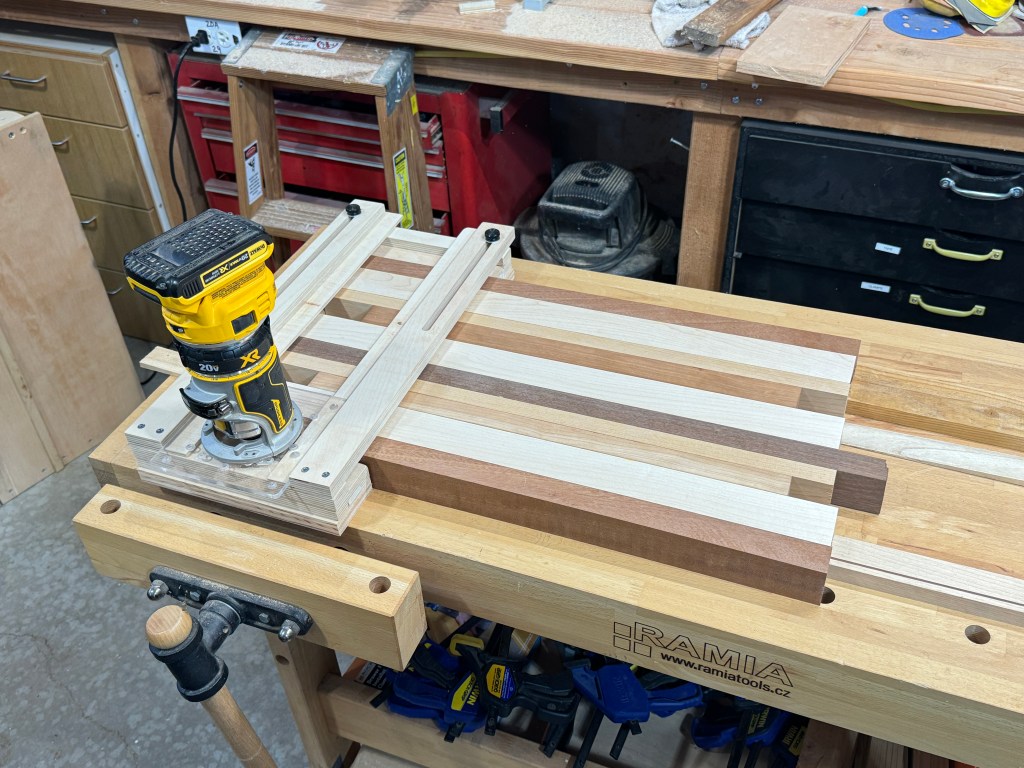
I could have done a better job of sizing the pieces at the table saw such that the top surface would be almost perfectly flat after glue-up but I didn’t, maybe because I was anxious to use my new flattening jig. I could have used the planer to do all the flattening but, as I said, I wanted to use the jig which employs a sliding frame that holds a compact router at a consistent height above the piece. You pass the router – equipped with a flattening bit – back and forth as you slid the jig along the length of the piece. Works pretty well although produces a prodigious amount of dust/cuttings.
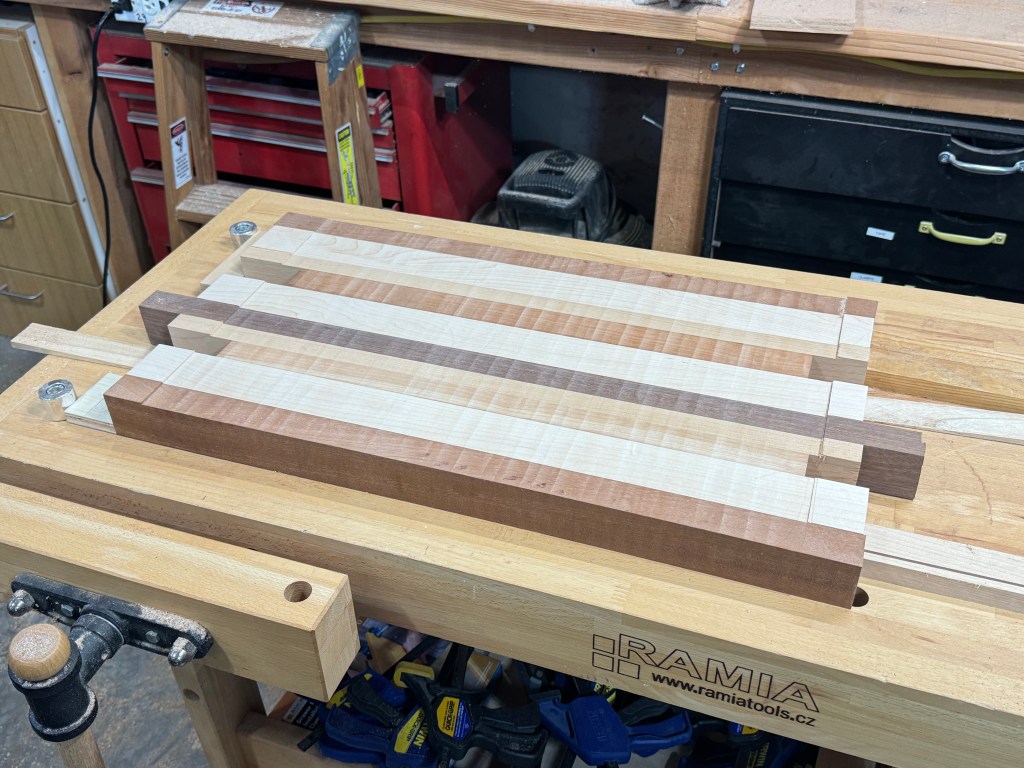
Next is cutting off the two ends and running it through the thickness planer:
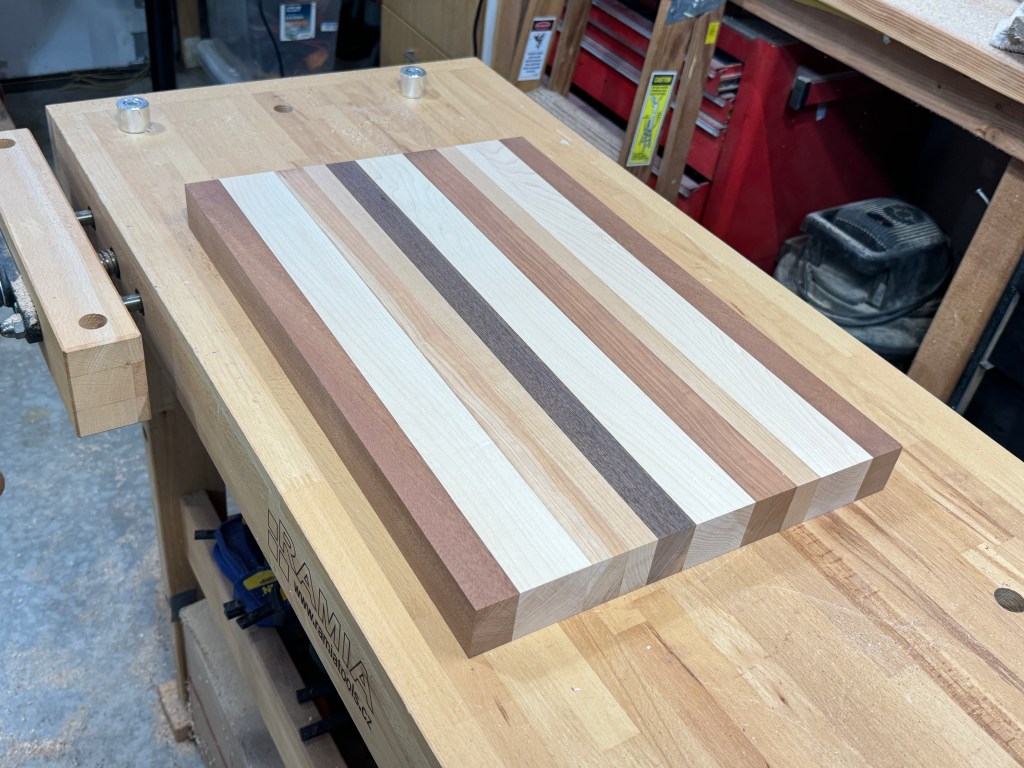
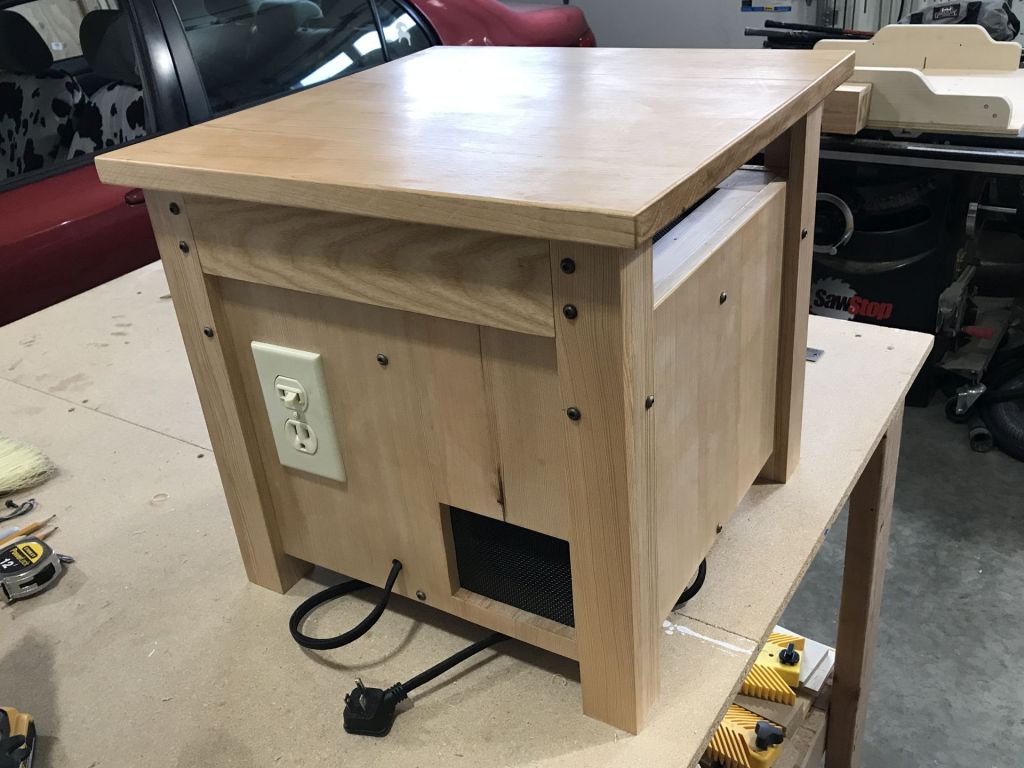
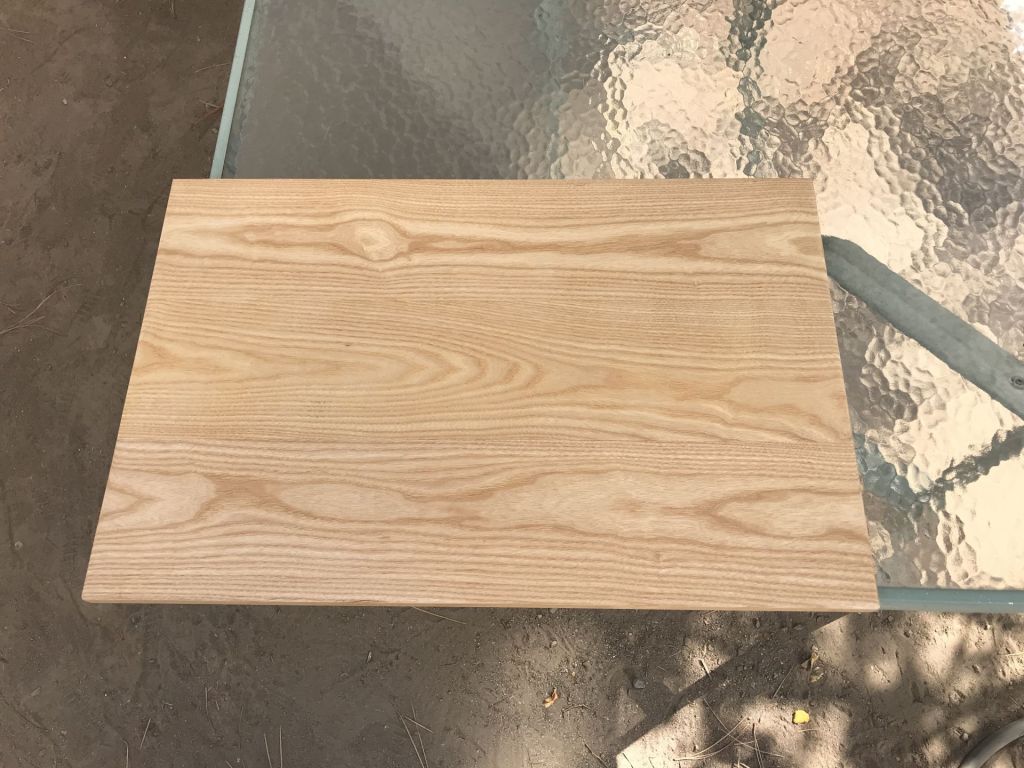
Round off the edges, finish with a few coats of tung oil, install rubber feet, and this is the result:
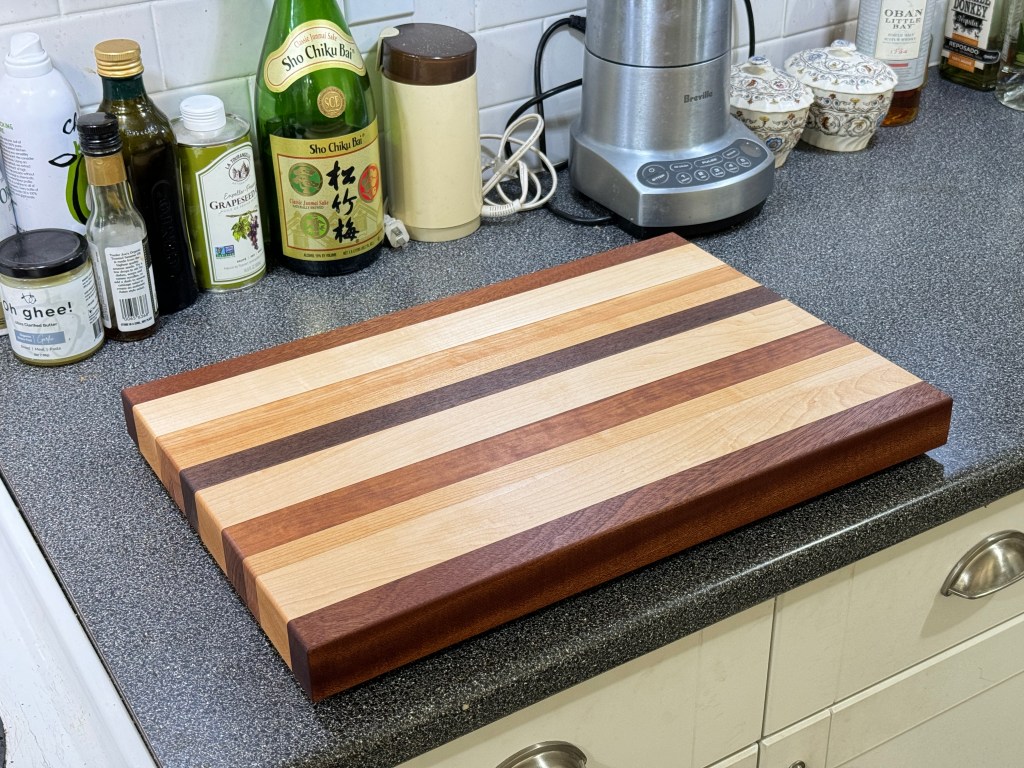
I think it turned out pretty well.
So, why is this post titled P-K4? As I alluded to in the beginning, I had a further purpose. The cutting board was just practice; I didn’t need a new board. No, I wanted to make a different type of edge grain board: a chessboard!
I ended up making three chessboards. The first was meant to be practice but it turned out well enough to call it good. The second and third were to be different styles: one a single piece and one that would fold in half. After I made the first board, I decided they needed edging to extend the footprint beyond the playing surface a bit. For wood, I needed two very disparate species. I had a lot of wenge on hand – a very dark, black wood. For the white squares, I decided on white oak but I didn’t have enough so off to the hardwood store again.
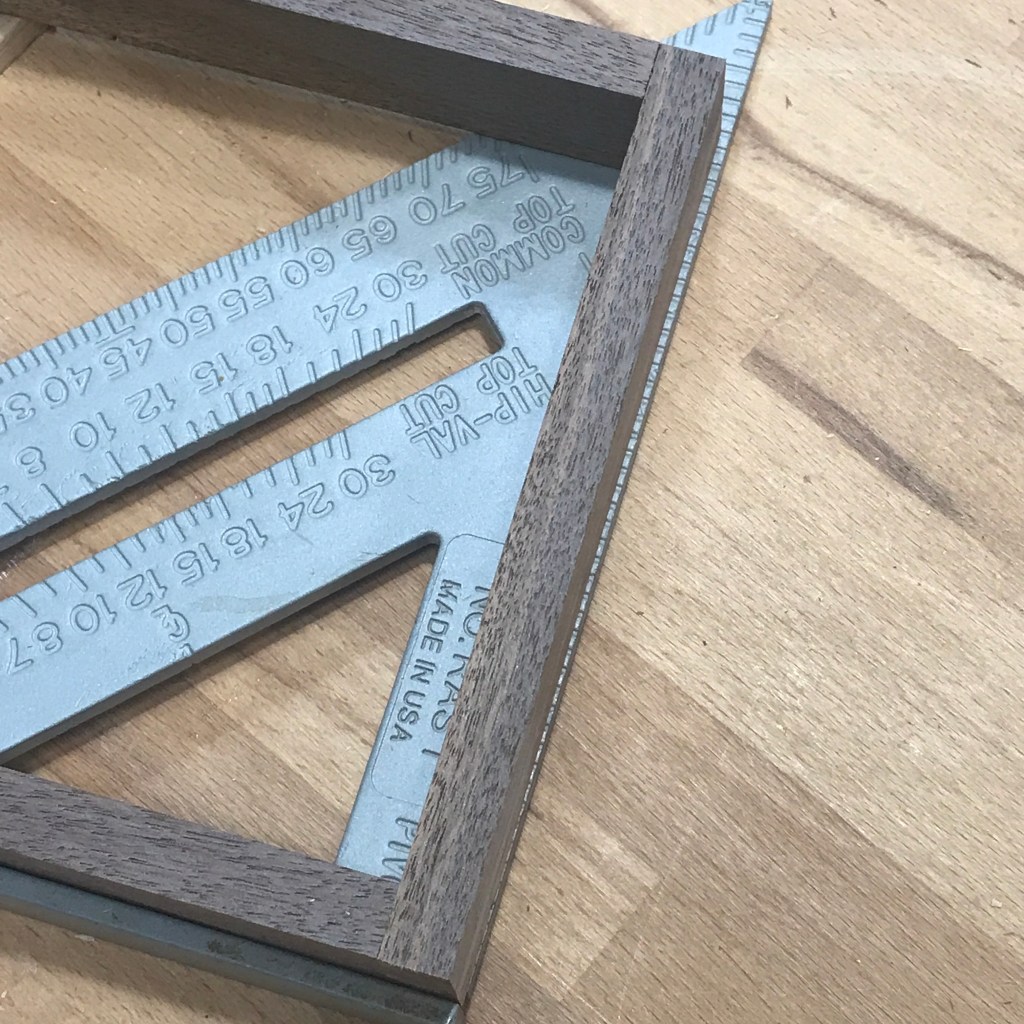
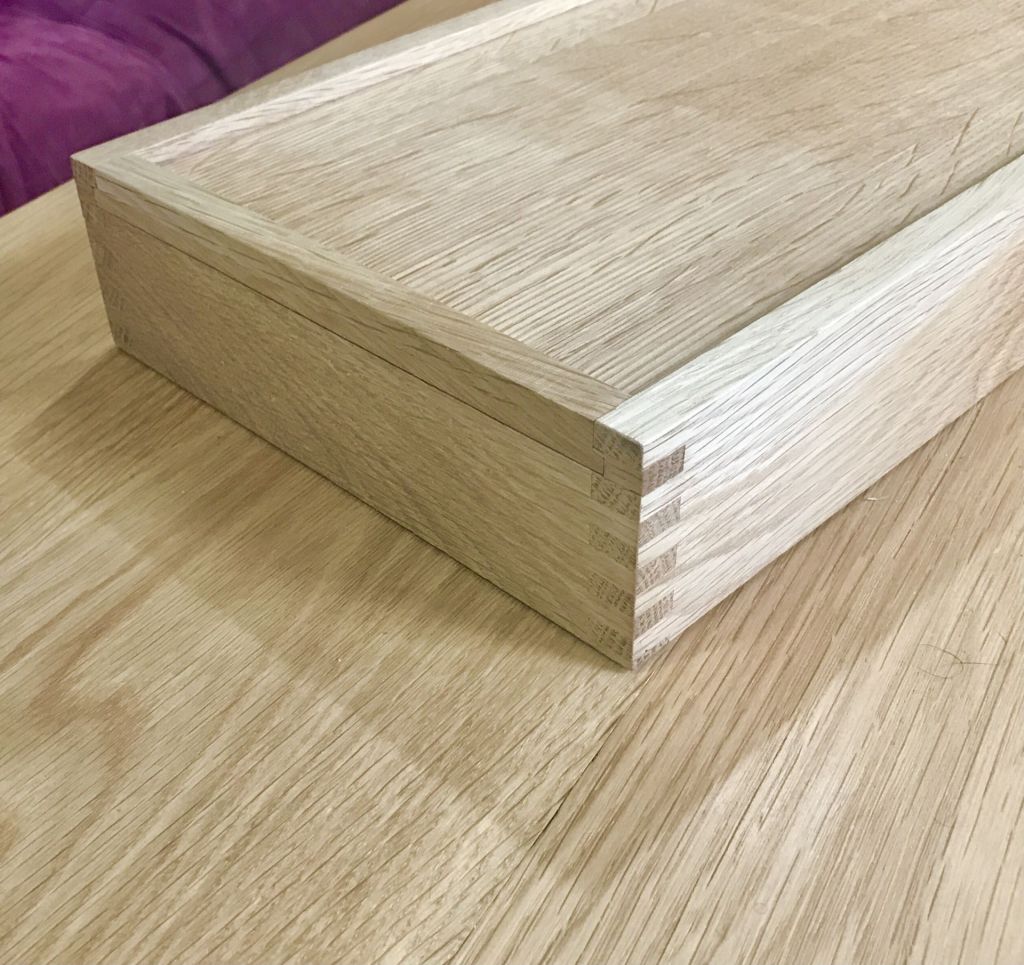
The edging was in two styles. The first and second boards received a sandwich of thin wenge/fatter white oak/thin wenge. The third got thin padauk/fatter white oak/ thin padauk. Padauk is a red wood which actually changed the final appearance of the entire board a bit, as we’ll see. To accommodate the foldy nature of the second board, the edging is flush with the playing surface. The other two have playing surfaces that are about 1/16 inch proud of the edging. To ensure structural integrity, all three have corner splices.
I’ll just go ahead and present all three to save readers the suspense. In order of build:


All three eventually were finished with wipe-on poly. You’ll notice that the first board has a succulent plant sitting on top. Seeing as I really didn’t need three new chessboards (besides the one I already had), I traded it for that nice potted plant.
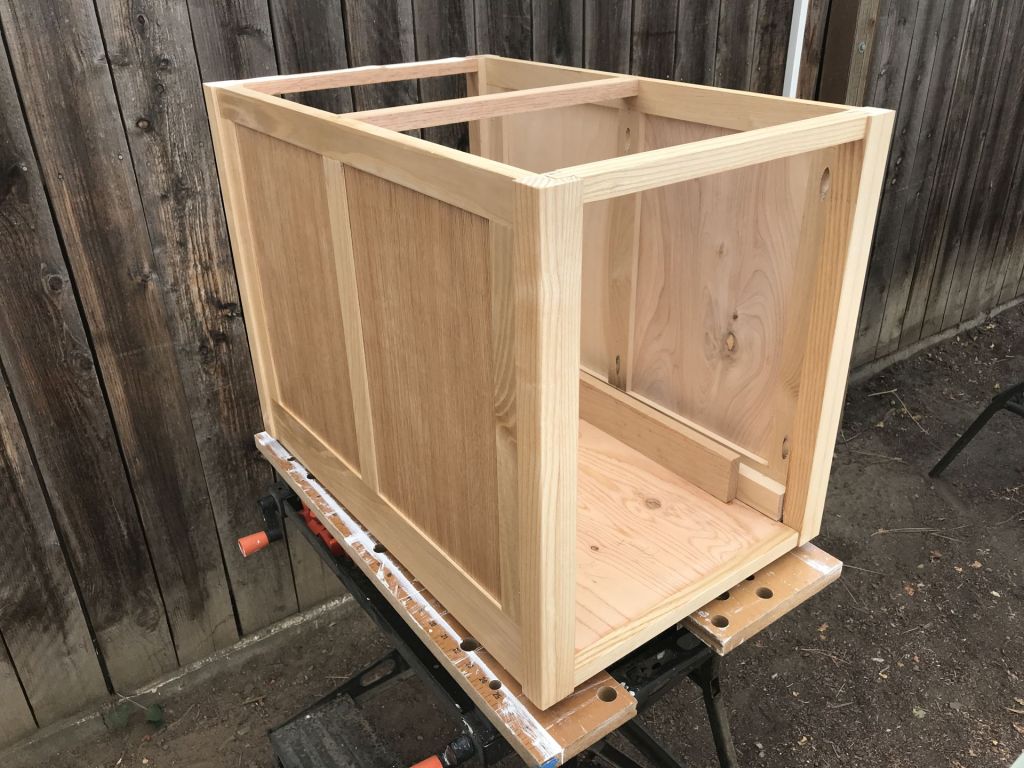
The build. As mentioned, the initial process is much like a cutting board: cut wood strips to size on the table saw and glue them up. It’s important that the eight strips are exactly the same width.
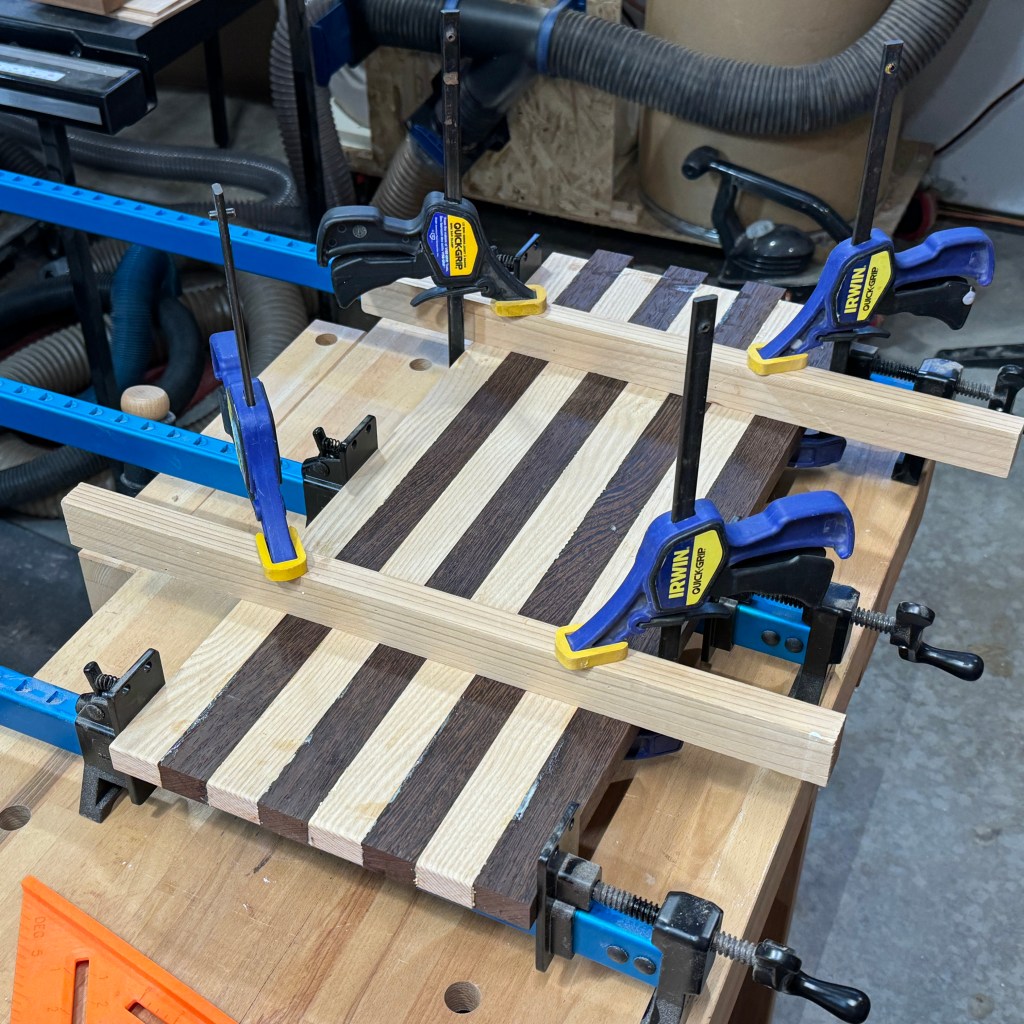
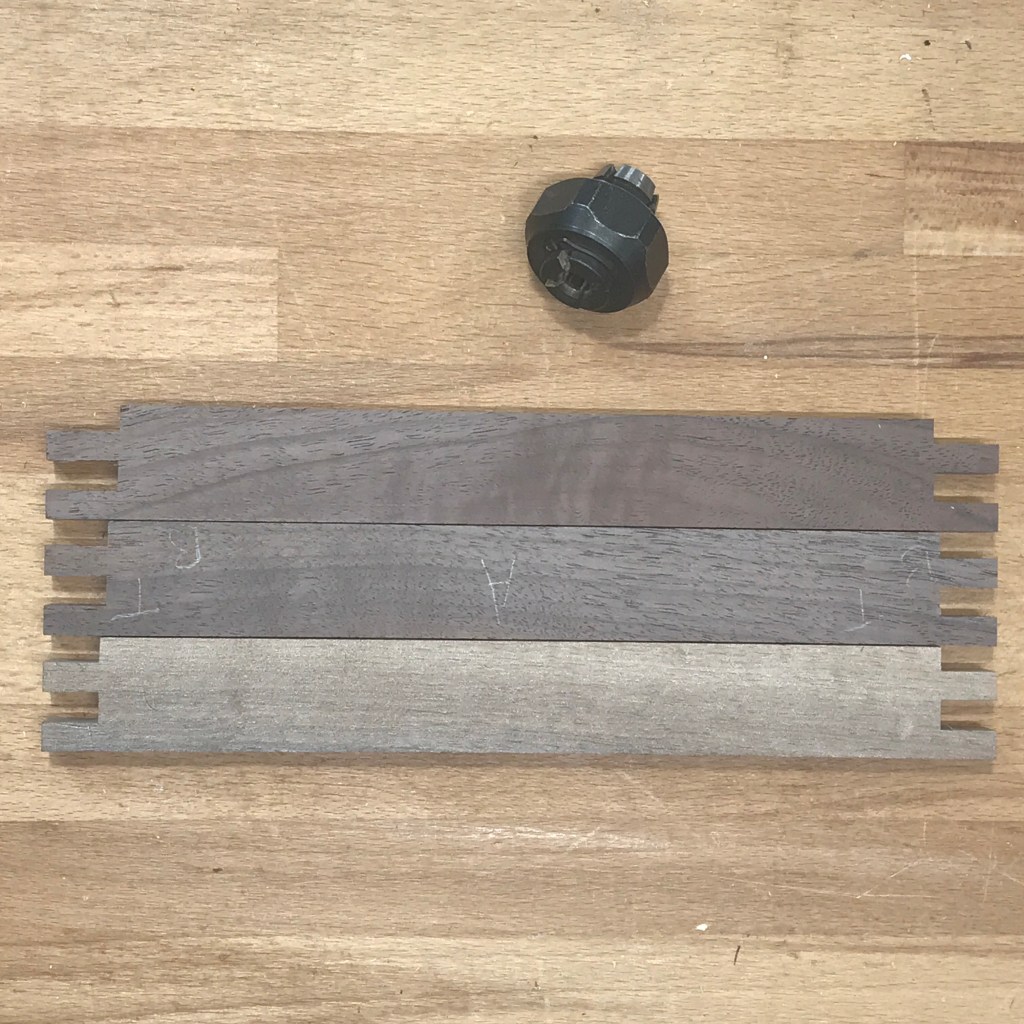
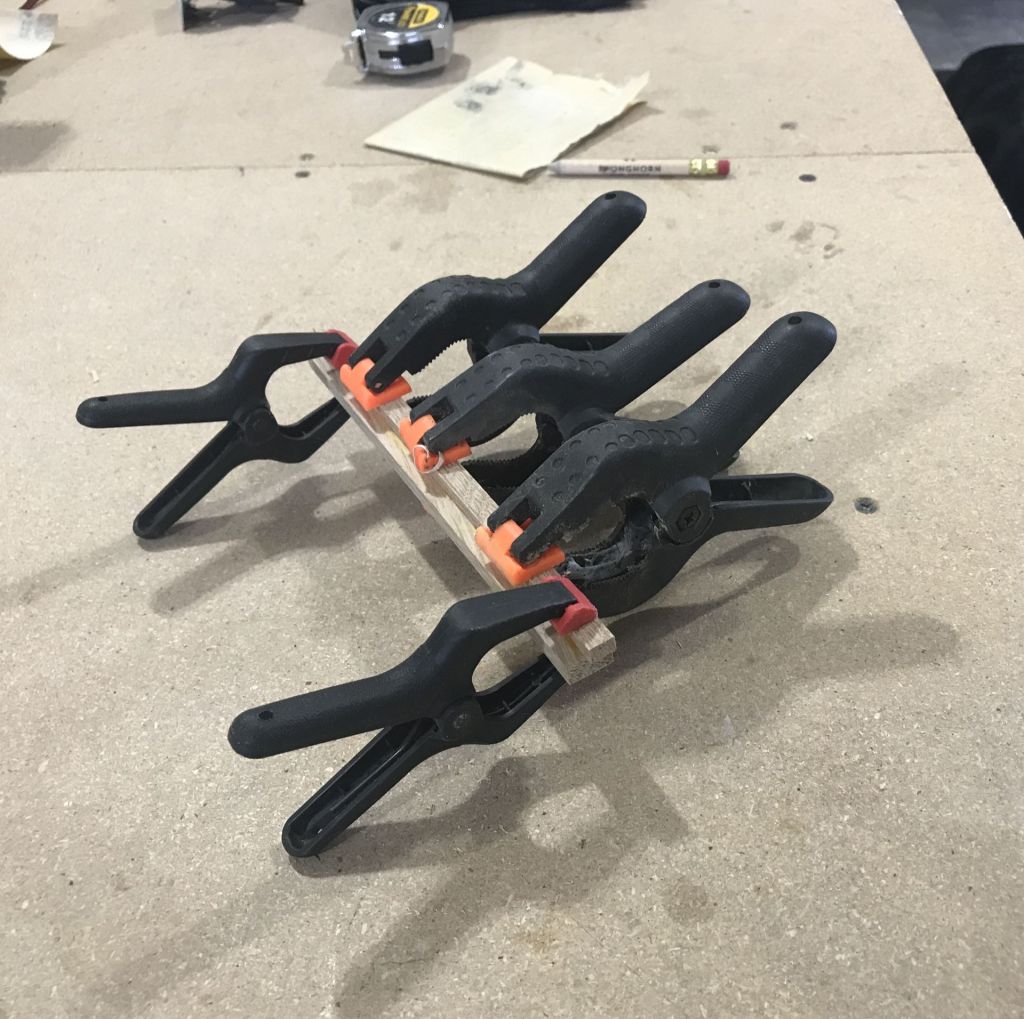
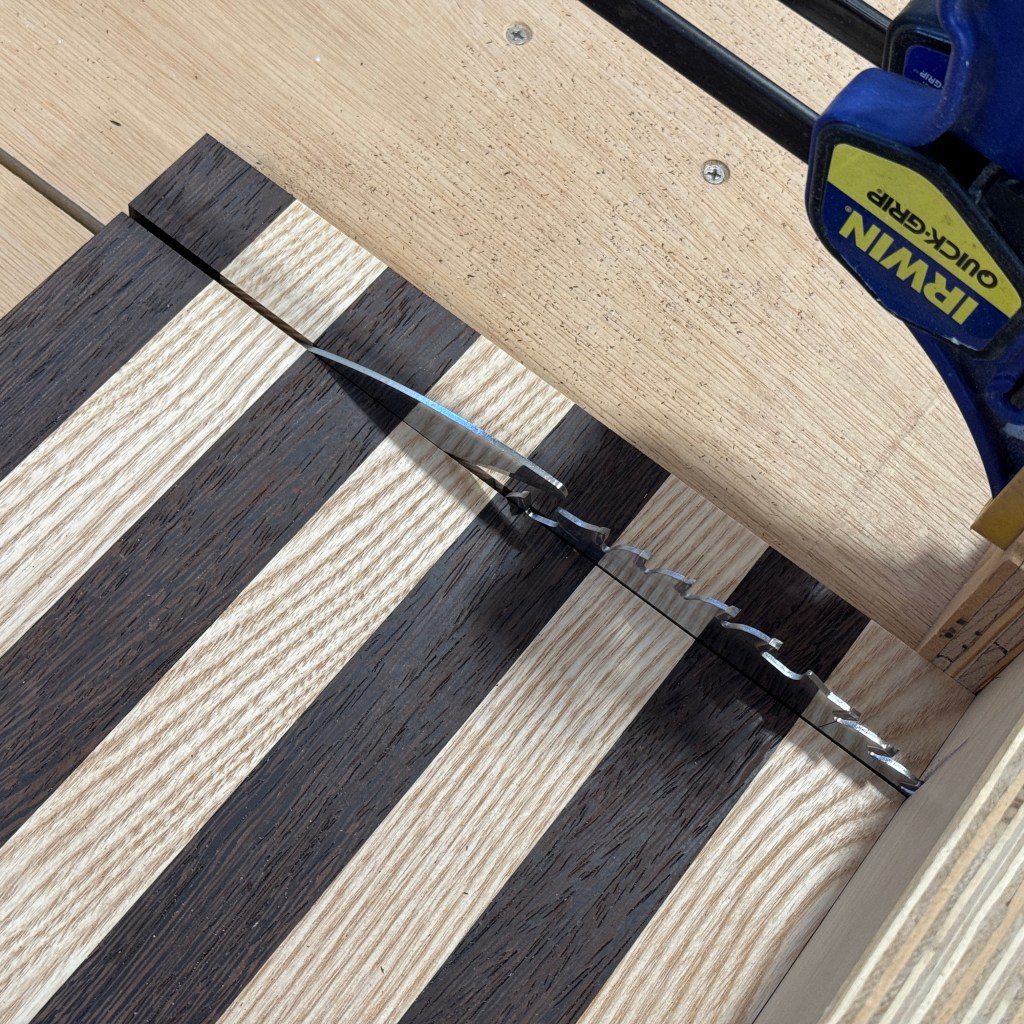
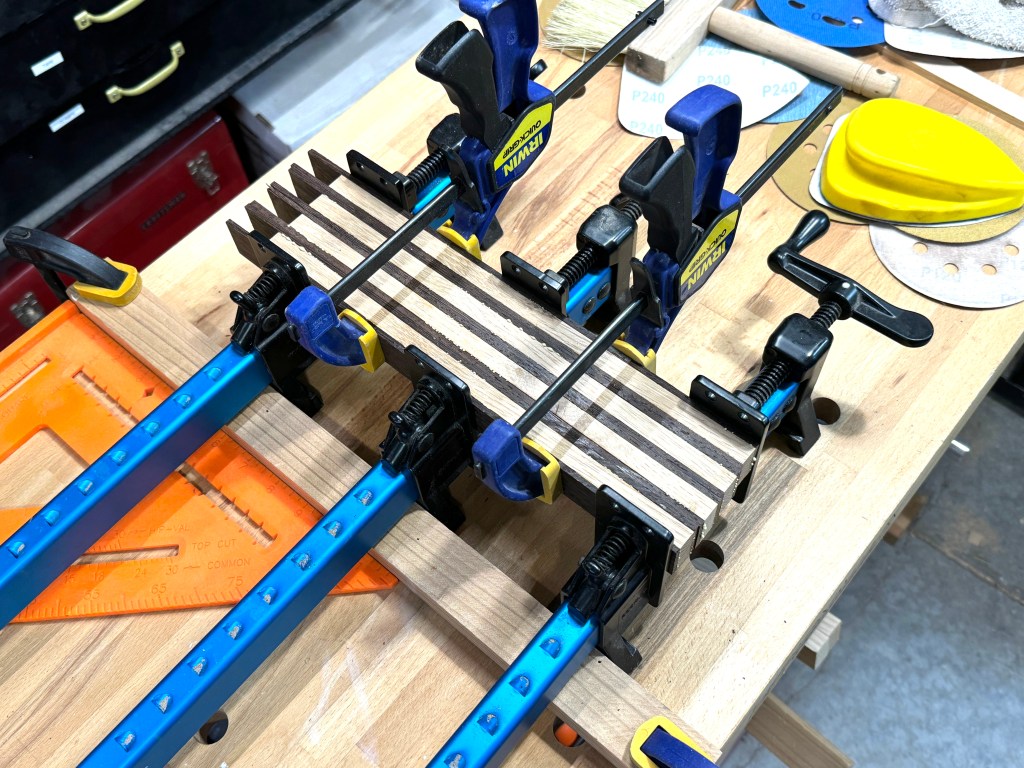
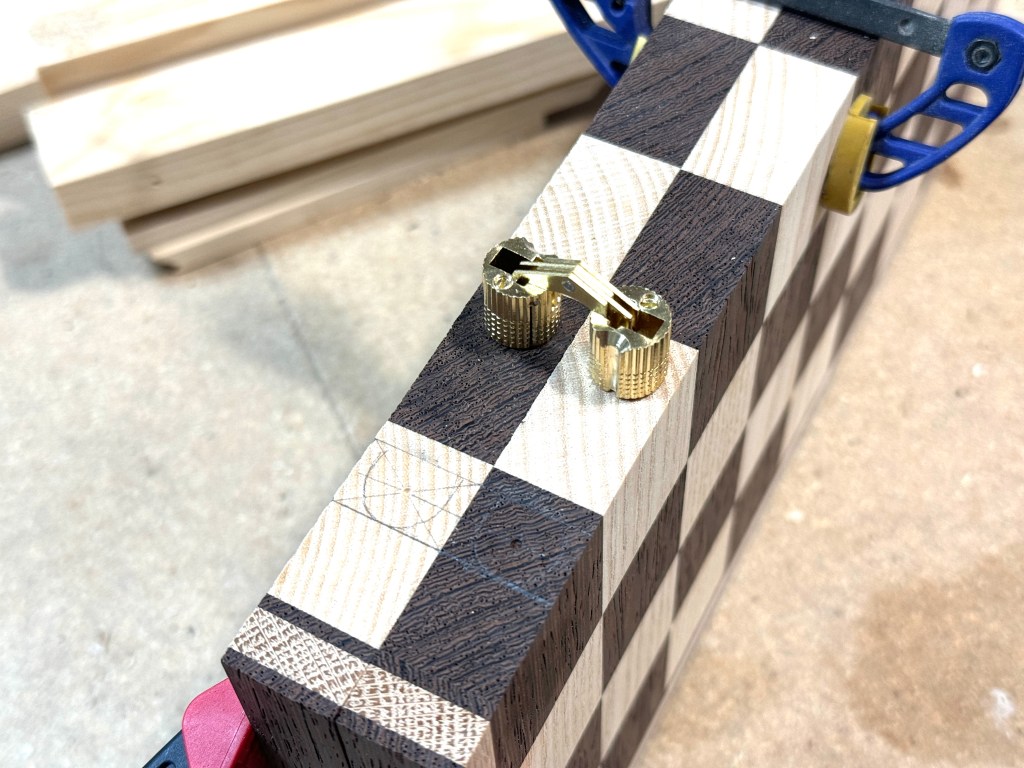
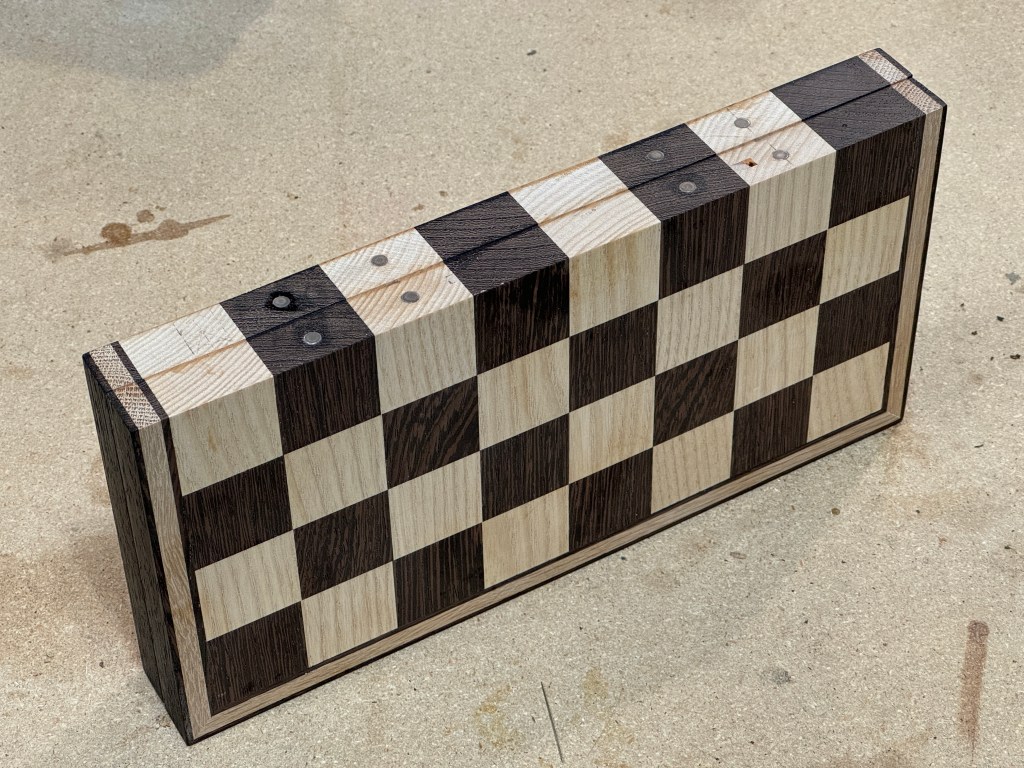
Next, after running it through the planer to get it nice and flat, cut eight strips across the grain. Here again, it’s important to measure carefully so the width of the cross-strips is the same as the width of the original strips, resulting in alternating squares, not rectangles. I used precision calipers but probably could have used a scrap piece of the original strips. Glue up those strips with the colors alternating. I used two edge boards in the clamping process to ensure the glue joints didn’t slip. Note that for the second board, which was to be a folding style, I cut one strip exactly one blade-width wider and glued it in the middle.


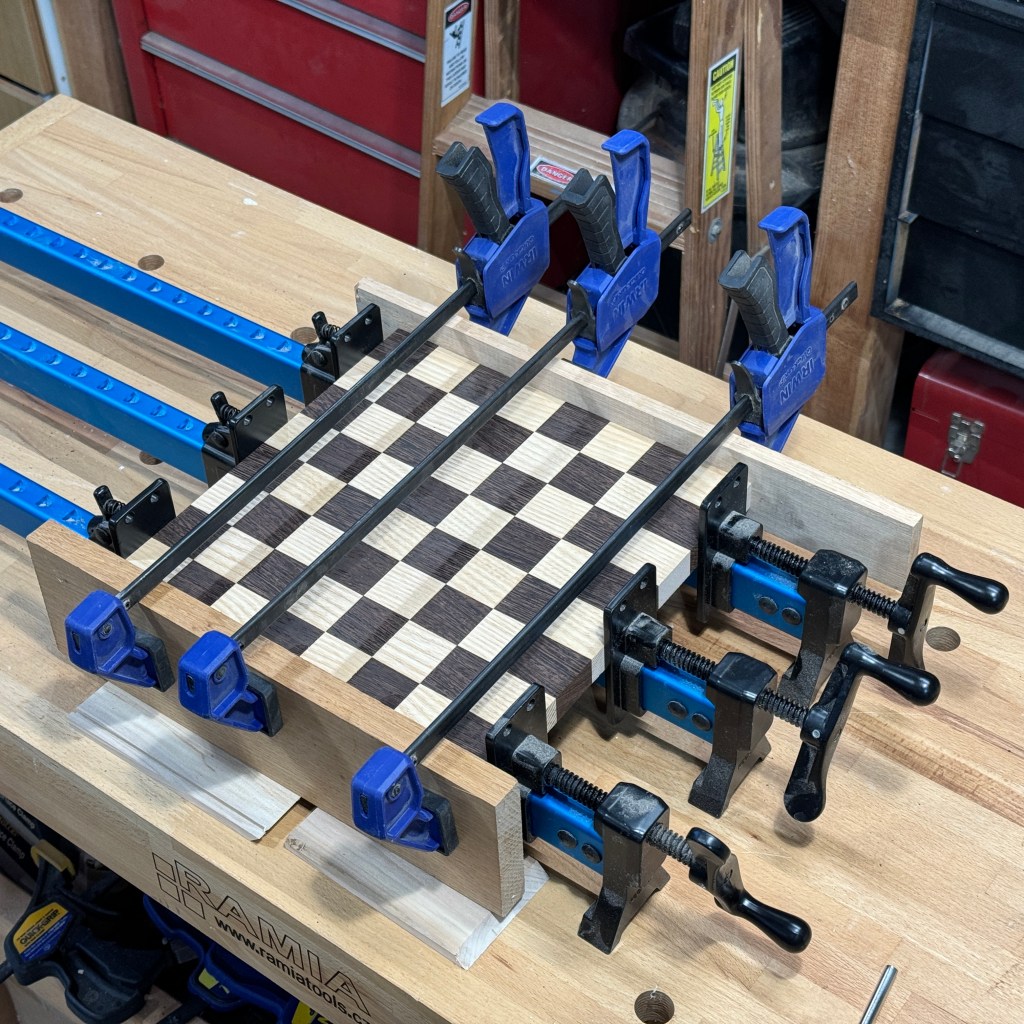
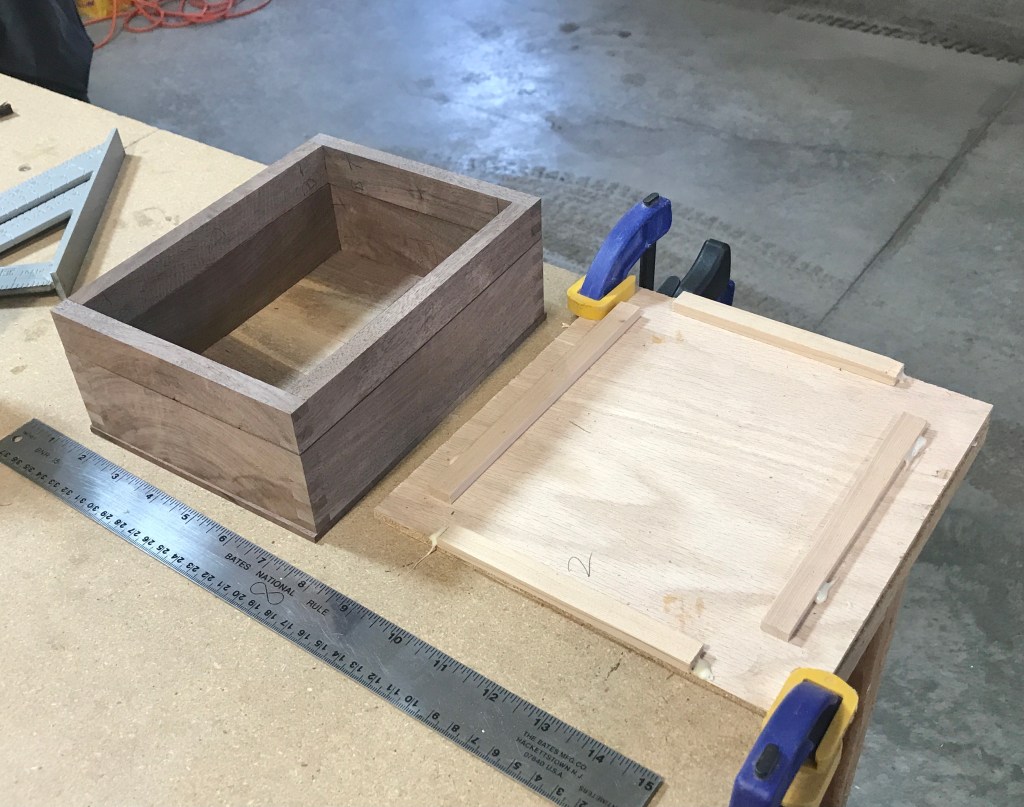
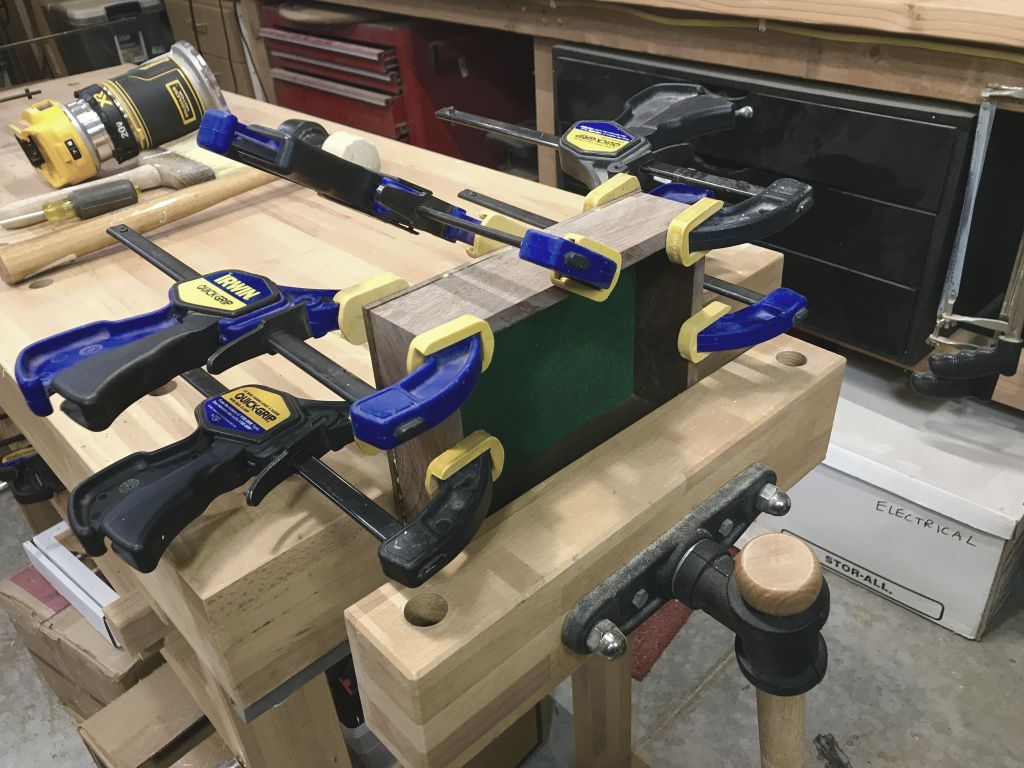
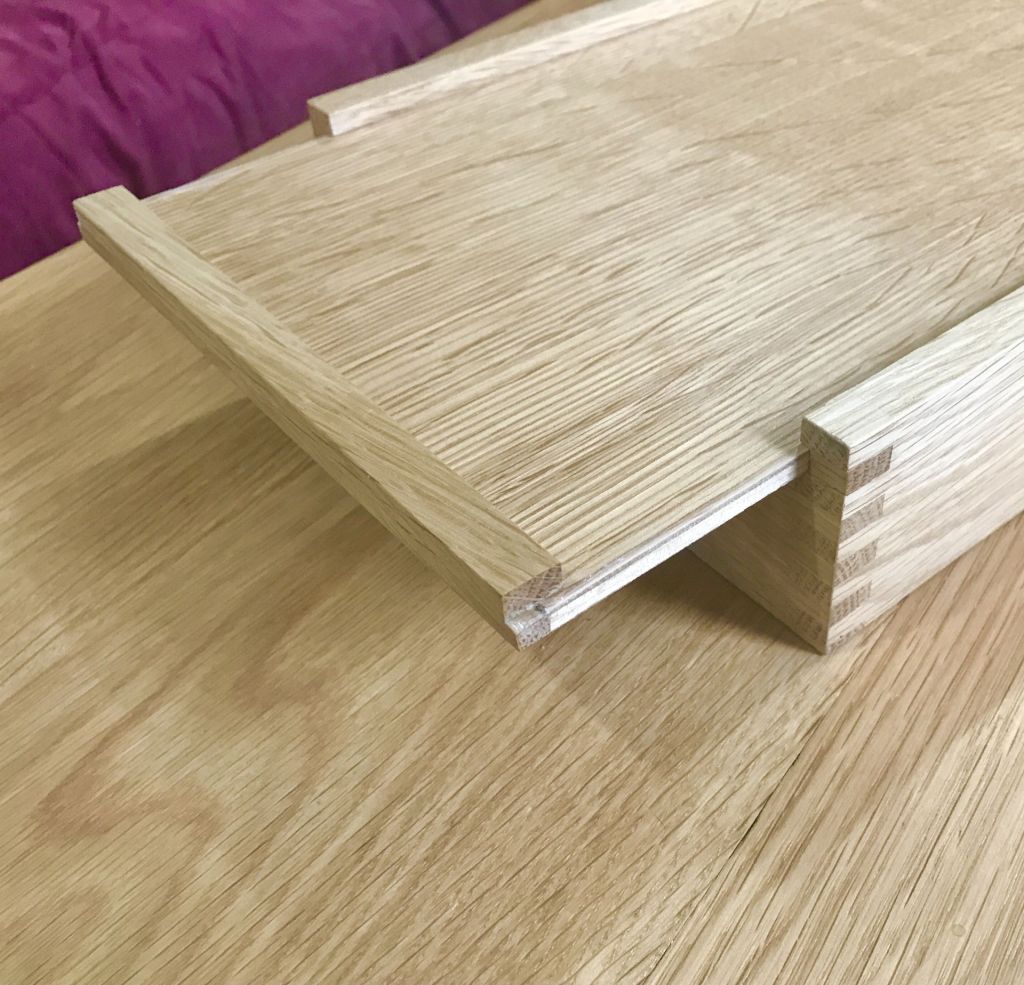
On to the edging for the first board (process duplicated for the third board). Here, I needed to be careful. Because wood tends to shrink or expand with seasonal humidity changes, I couldn’t just glue the edging to the side of the board. It would eventually fail, probably. After consulting online sources, I decided the solution was to use a square of MDF (medium density fiberboard), which doesn’t shrink or expand. The MDF would be about 1/4 inch bigger on all sides than the board. I then would glue the edging strips to the MDF. Finally, I would insert the board inside the edging and secure it on the bottom with good double-sided tape. That was the plan, one that would require a bit of care to ensure the board fit snugly inside without gaps showing. Much to my surprise, it worked! Hopefully, these photos show the process:


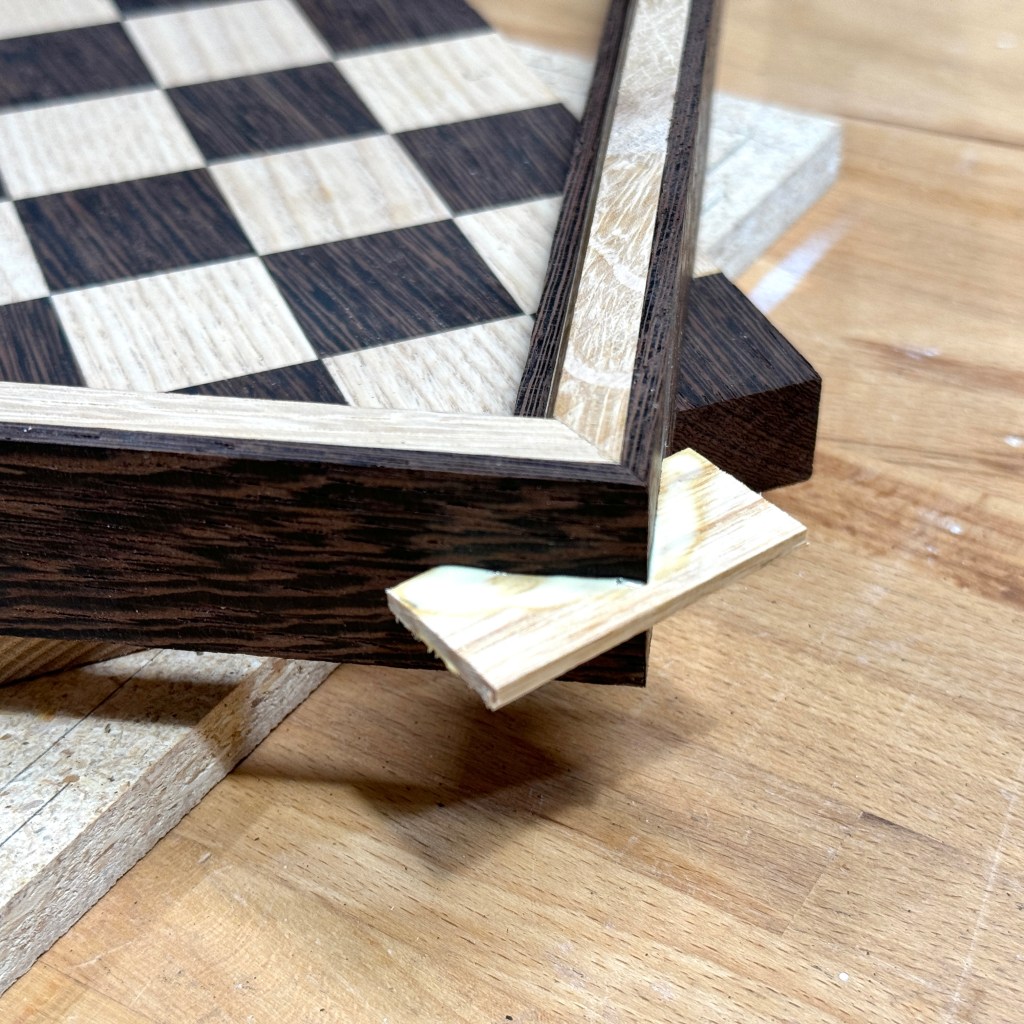
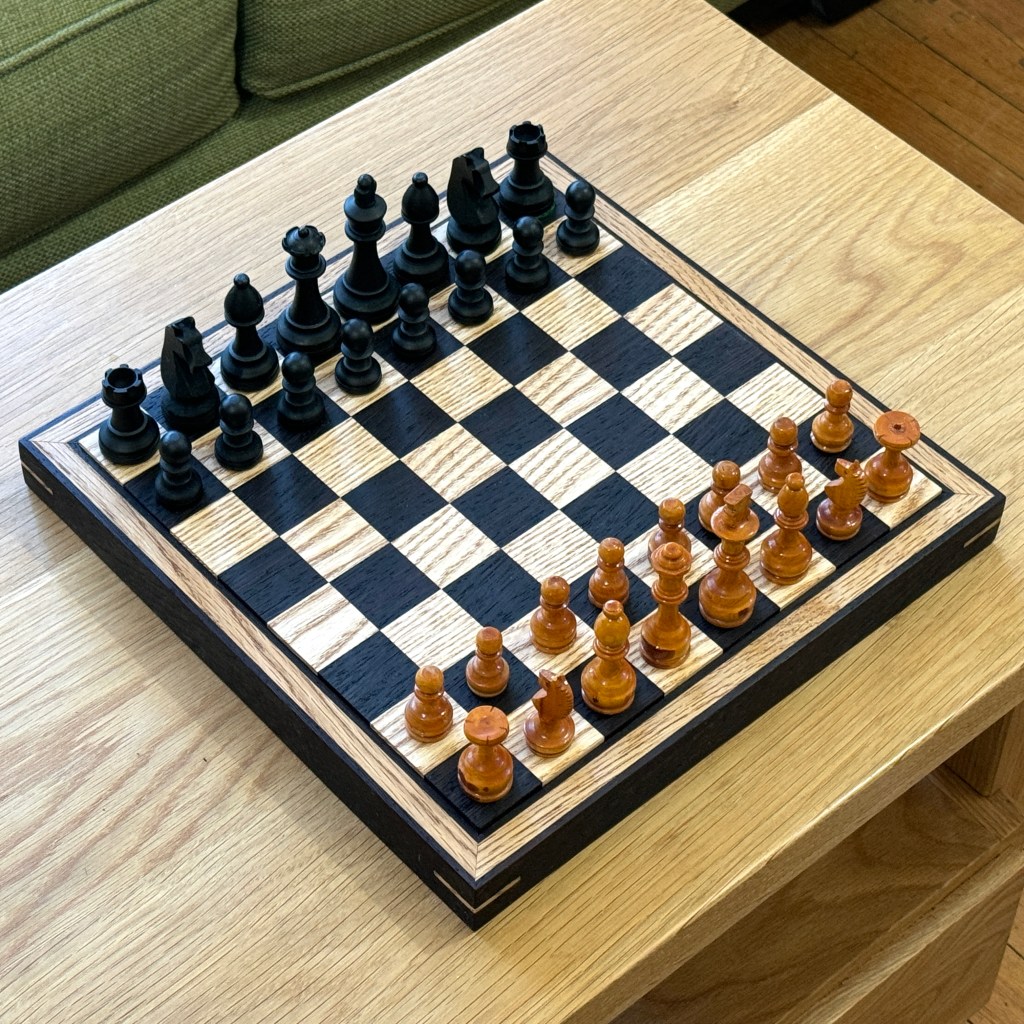
Looks like that last photo of the corner splices is a bit out of focus. Here’s the board finished and in action. The white pieces are from my old board that I got in Mexico a hundred years ago. The slightly larger black pieces are a set I bought online. Testing to see what size best fit the board.
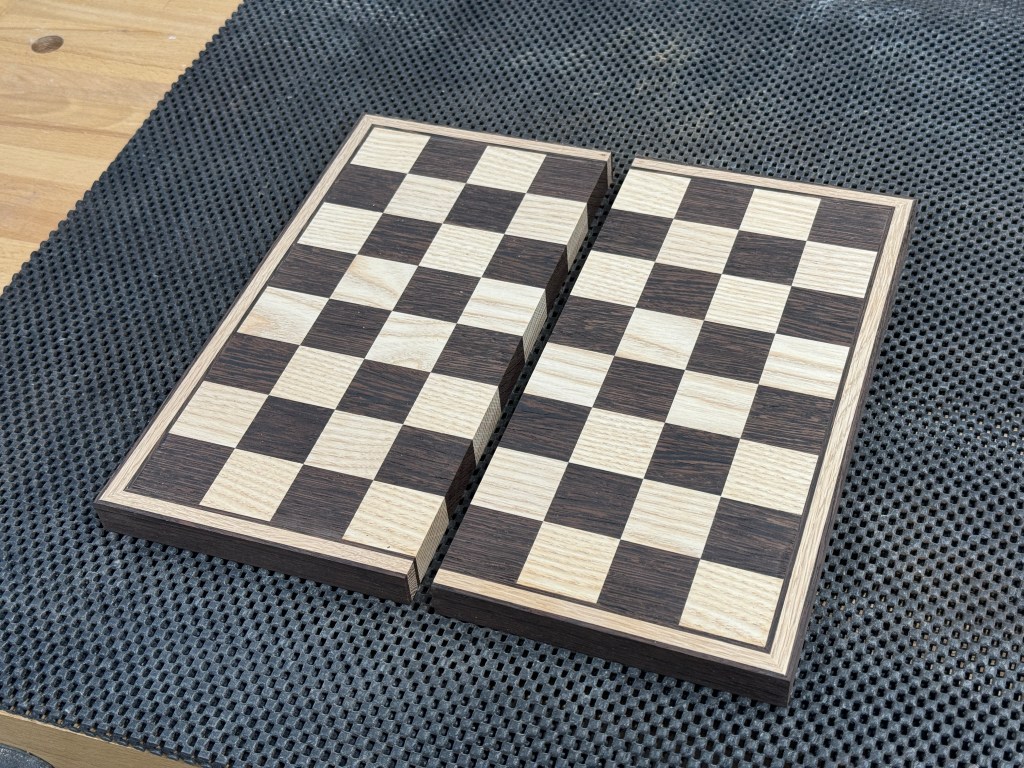
The second, folding board didn’t work out well, at least not the folding part. I initially thought to use barrel hinges but couldn’t get them to work such that the board opened and closed flat with no gap. I gave up and used small magnets instead. The two pieces are separate but come together to form a complete, flat playing surface, held by the magnets. Not sure it will get much use – I may trade it for second succulent plant!

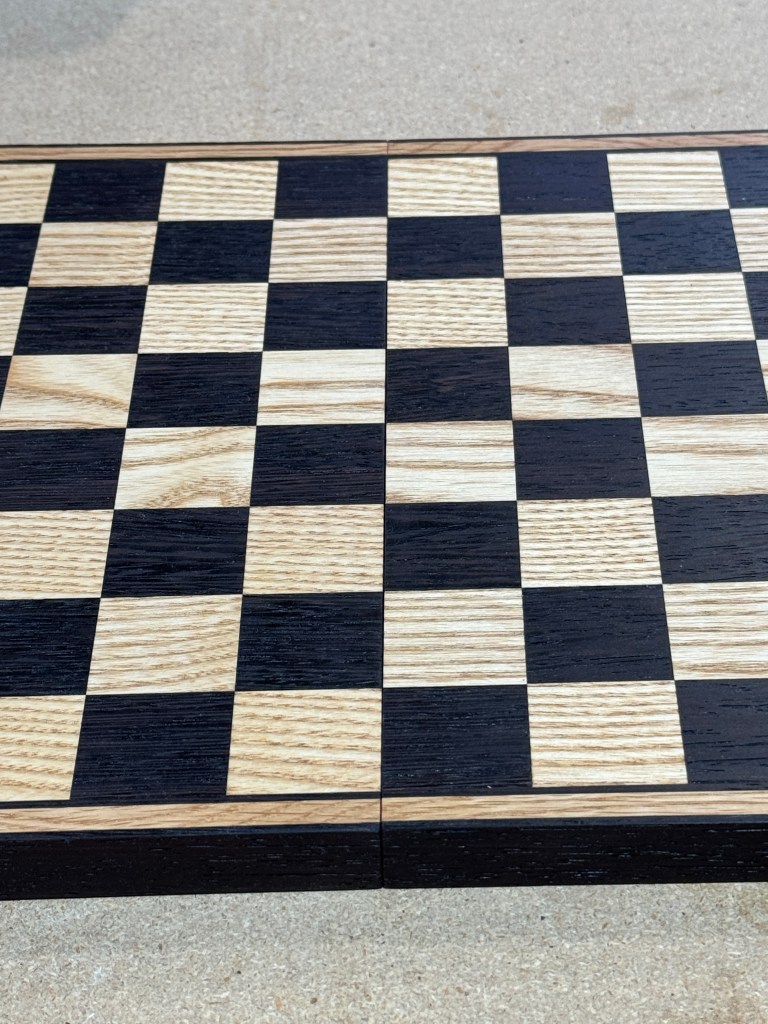
Finally, the third board. Fashioned the same as the first except with padauk edging, it’s a bit bigger than the other two. About that padauk. When sanded, it produces a very fine red dust. The other wood is white oak, which along with being white, has the typical open pores found with all oaks. Red dust + open white pores = slightly red white edging. The white isn’t so white anymore after all that dust got in the pores. I couldn’t get it out completely. So, despite being made of the same species – wenge and white oak – the third board looks different. And that’s fine. I like it.
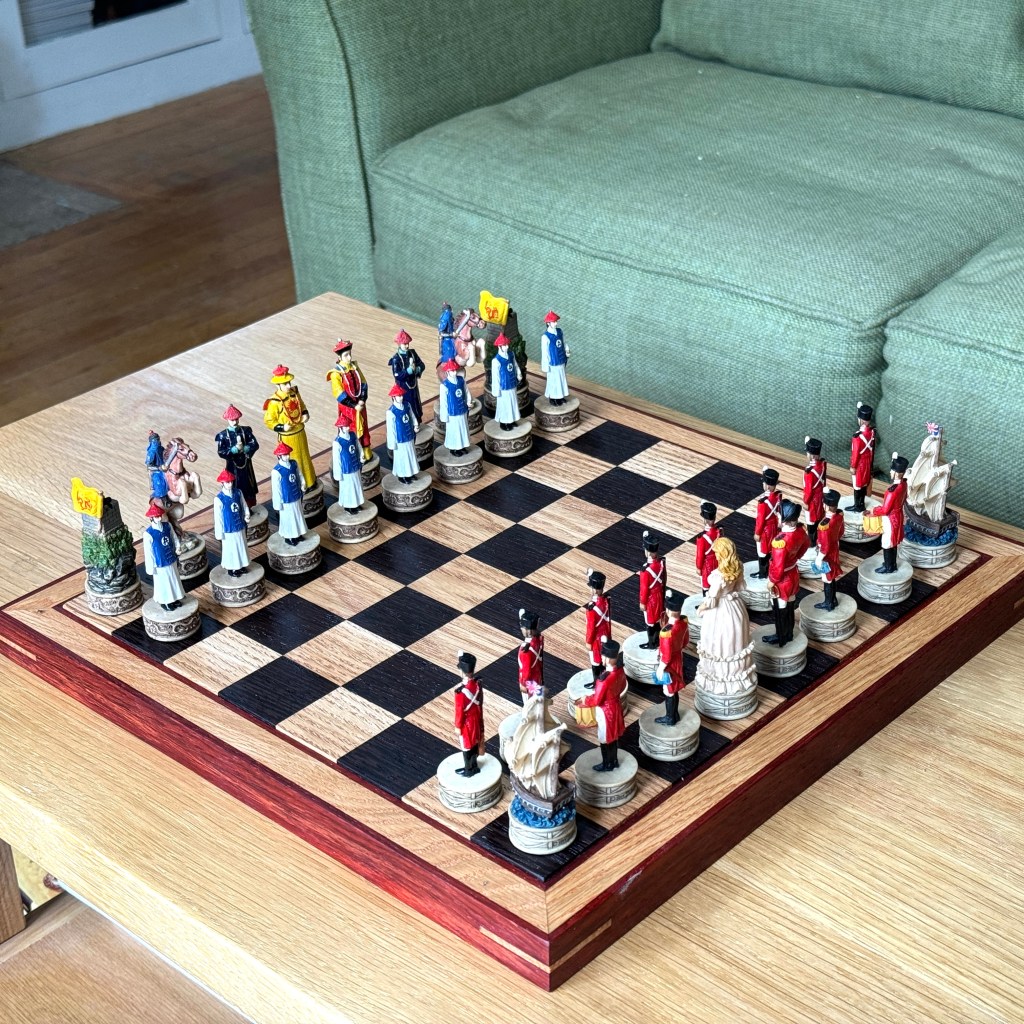
I didn’t give away any chess pieces with the second board, so the ones I bought online will be used with this one. For now. What I really want is a nice old set of wood pieces. I look for them at garage sales, thrift stores, etc. While in Hawaii (Chinatown) this past year, I found a really cool set of painted resin pieces made by a company that designed them in the style of historic armies. The set I bought pits the English and Chinese circa 17th or 18th century (I think), back when the European powers were beginning to explore and exploit the Far East, maybe later. While definitely unique, they are a little disconcerting to play with the because some of the pieces don’t look ‘normal,’ particularly the English side: a sailing ship for the rook, drummer for the knight and a slightly taller guy without a drum for the bishop. The Chinese king and queen are hard to tell apart at first, too. I’ll keep a lookout for better chess pieces.
Cutting board and chess boards – fun projects.